
Wednesday, July 31, 2013
Cheapie Signal Tracer Mark II
Saturday, July 6, 2013
Bogner Alchemist 2x12 Service Review


The Bogner Alchemist is a 40w, 2 channel amp with digital reverb and delay onboard. It comes in three varieties-a 1x12 combo, a head and cabinet, and the one here which is a 2x12 setup. The speaker choice is at first a little odd, being a Vintage 30 Celestion below and a Greenback on the top. Reinhold Bogner, the witty proprietor of the Bogner empire says that it's for a reason. If you want to mic one tone, pick the speaker you want to mic. They're slightly different.
The amp's made in China in the Line 6 factory. Reinhold Bogner says that this allowed him to build something to his specifications, keep the price manageable and take advantage of the Line 6 broad based distribution and service network. He also says that a lot of the components in the Alchemist were brought in to China because some things were not locally available. The cabinet is made of birch plywood-no MDF here. Opening it up, capacitors from Sprague, Wima, Mallory, Nichicon, Xicon and Nippon Chemicon abound. The iron came from the Chuang Meei works in Taiwan and the transformers are well finished and beefy.
The chassis is constructed of .068 sheet steel, spot welded at the corners and powder coated. The circuit boards have nice wide traces and are well supported-no flexing when you push a tube into its socket. Another good touch is 4 plastic chassis screw guides that pop into the chassis and guide your attachment screws down into their mating holes.
And, except for the effects board there are NO surface mount devices like you find all over a Blackstar. That brings us to the subject of maintainability, and the complete build manual for the Alchemist can be downloaded here. The owner's manual is readily available too.
http://elektrotanya.com/line_6_alchemist_sm.pdf/download.html
That brings us to the power supply. The filtration is good, and all the power supply goodies are mounted on a separate circuit board, In fact there are six boards, each with their own function, connected by ribbon cables and hard wires. One thing's for sure-there is no shortage of fuses. There are the externals-a 2.5a slow blow 5x20 in the IEC socket, and an 0.5 a slow blow in the fuse holder. But it doesn't end there. On the power supply board there are two more-an 8 amp 5x20 slow blow for the 6.3v filament circuit and a 1.0a slow blow for the B+ supply.
If you own an Alchemist make sure you order some 8a slow blow 5x20 fuses because they're not easy to find. Mouser Electronics has them.
Other nice touches include a shielded input with ferrite rings for noise suppression.
The glassware that came with the amp was a little odd. There were 4 Mesa 12AX7s and a Ruby marked 12AX7 which was nearly defunct. Out they went, to be replaced with 2 new RCAs and 3 BEL 12AX7s. After installation one RCA and one BEL were found to be a bit noisy so I subbed in a pair of 6681s.
I am running pretty short of my last ditch preamp tamer Philips 6681s I got a while ago, so I looked around and found a guy selling Penta Labs 6681s. The original 6681s were a premium mobile rated tube, very stable and quiet and just the ticket to tame an overly energetic preamp. These were something of a product test to see if they were anywhere near as good as the Philips items. So far, so good but keep your shirt on for a while.
The power tubes are Ruby 6L6GCMSTRs, and I decided to keep them because that's what I sell my customers and they've performed well for me. Another nice touch is that the power tube bias is individually adjustable for each tube via a pair of Bourns multi turn pots. No more worrying about mismatched tubes. I was able to dial the power tubes in to within .1 ma, which is pretty damn good. I removed the cage around the power tubes, it's not needed and is probably there to satisfy safety regulator types. There is also a small trimmer on the power supply board marked R3 I think, no idea what it's for so I left it alone.
There are three qualities any guitar amp or bass amp must have to make it in the big wide world-it must be reliable and sound good or else it's a piece of crap, as Reinhold Bogner says, and I would add that it must be serviceable out in the world and follow the Donald Douglas rule of "How will it do in Peoria?". I have seen some commentary on various forums about the foot pedal plug being a dodgy proposition but I haven't tried mine and don't intend to bother with it. A number of people have talked about the Alchemist DOA syndrome which I suspect is traceable to the 6.3v 8a fuse-that was what was wrong with the one I worked on. Time will, of course tell what the reliability ends up being but for now it looks OK.
For now, I'd give this amp a preliminary thumbs up. The price is right and they aren't making them anymore, and it is a lot better built than a comparable Deville or Blackstar as well as sounding more smooth and well behaved in my biased opinion.
Thursday, June 20, 2013
Rat Rod Bassman


Originally I was on board to reassemble and overhaul the chassis,, and and it sat for a while until my friend informed me that he was moving south of here a ways and wanted to get this amp back to the owner.
So he asked me to kind of pull the whole thing together. The speakers were pretty well trashed and two were beyond repair so out of my collection came 2 C10Ps that came out of a barn find Standel and seemed in pretty good shape.
That took a bit of yesterday and today. The ears of the cabinet where the chassis screws go through were a little weak so some 5 minute epoxy, poured in and set did the job. I had to fabricate a couple speaker leads and install a handle I had kicking around here.
It sounds pretty good but does need a set of new or reconed speakers to bring out all its primal glory.
Friday, May 17, 2013
Peavey 6505+ Biasing
A Peavey 6505+ arrived here needing a general going over. It was first determined that the power tubes needed replacing as there was a cathode current spread of about 17 ma, lowest to highest. I also tested the allegedly new preamp tubes and found one to be very weak.
Once I got my preliminary work done I powered the amp up on the bench and noticed it was very low on volume, and that there was a lot of crackling and popping when tapping the very flimsy preamp tube board.
Some cleaning and swapping was in order, but what cured the issue was replacing V5 with a new old stock GE preamp tube.
Setting the bias is relatively easy on this amp because there is an external control, but the range was sufficient to only get me to 17 ma-not enough by a landslide.
The fix is removing the 12k 1/4 w resistor on the bias control board and replacing it with a 6.8k resistor. Here you see the results with plate voltage at 439 and cathode current at about 35ma.
Although super high gain amps are not my cup of tea, this one seems to be reasonably well constructed for the genre, but the preamp tube board is a definite weak point. When installing preamp tubes from the outside the board can be felt flexing and viewed from underneath there's no doubt that this is not a good feature-there is not nearly enough support. In the attached pix you can see the back side of the preamp tube board, the bias control board that the range resistor gets changed on, V5 which was the source of all that trouble, and the finished result.
.


When doing my research I found that a lot of people on the chat boards treat the bias control pot as something of a dial-a-torque sort of arrangement. Turn the knob, get the tone-that sort of thing. I attached a warning label and taped over the control.

Friday, May 3, 2013
Bandmaster Build refried.
Here's a pic of how the cabinet turned out. I'm not real happy with it but I think a bottle ring and a few cigarette burns might improve the general appearance.
Linky
Linky
Sunday, April 28, 2013
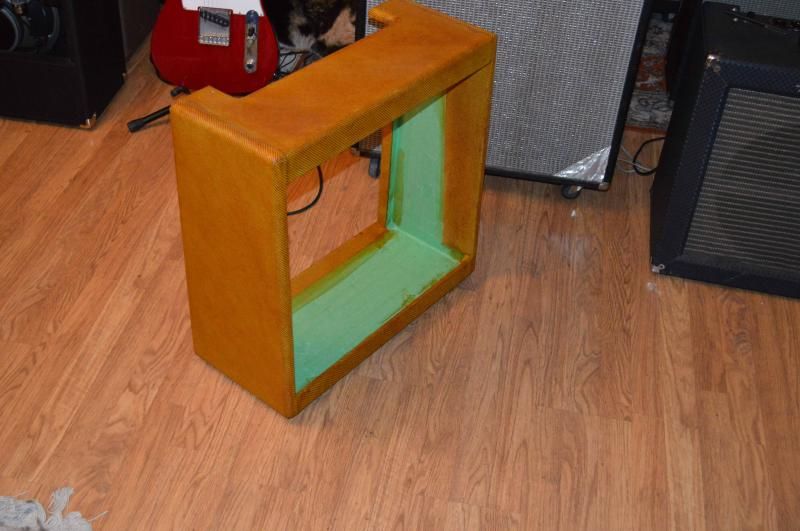
Bandmaster Build Part 4: Sorting Out The Cabinet
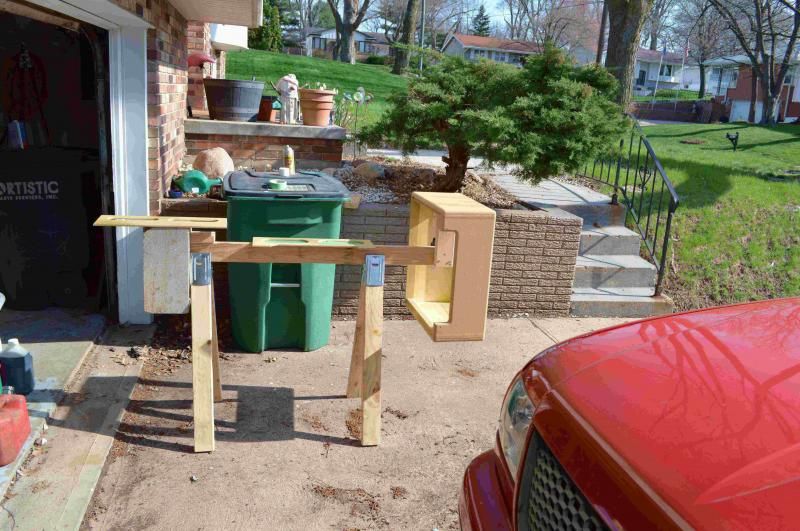
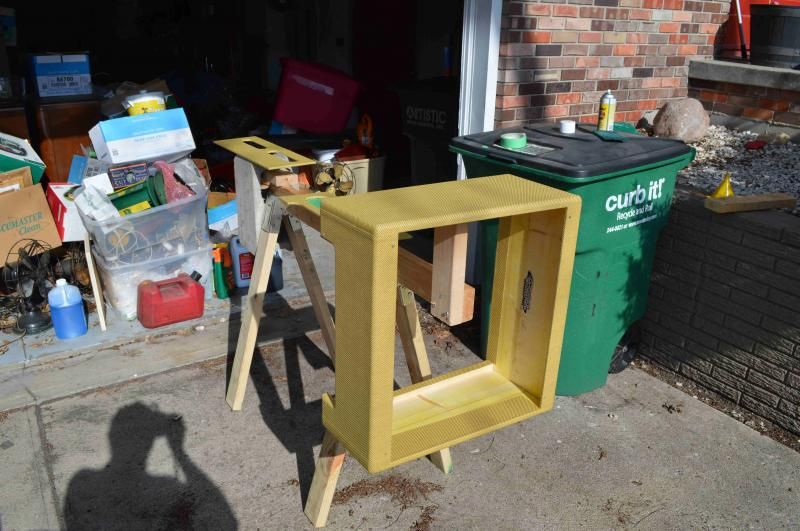
Once the weather warmed up enough to think about getting the cabinet shaped up for my 5E7 Bandmaster build I had to devote a little thought to making up a fixture for finishing the cabinet. I went out to the garage to see what could be found and settled on a pair of sawhorse leg connecters I'd purchased a while ago for the workbench project. A few chunks of 2x4 and some self tapping screws and I had it. Adding the extension made it easy to add a counterweight in the form of a cinder block that happened to be wandering by.
As I started putting the first coats of shellac on the cabinet-about which more anon-I discovered that the cabinet had been built with a seriously warped on one side board. I emailed the fine folks at Weber and they were good enough to provide another cabinet at no cost-props to them.
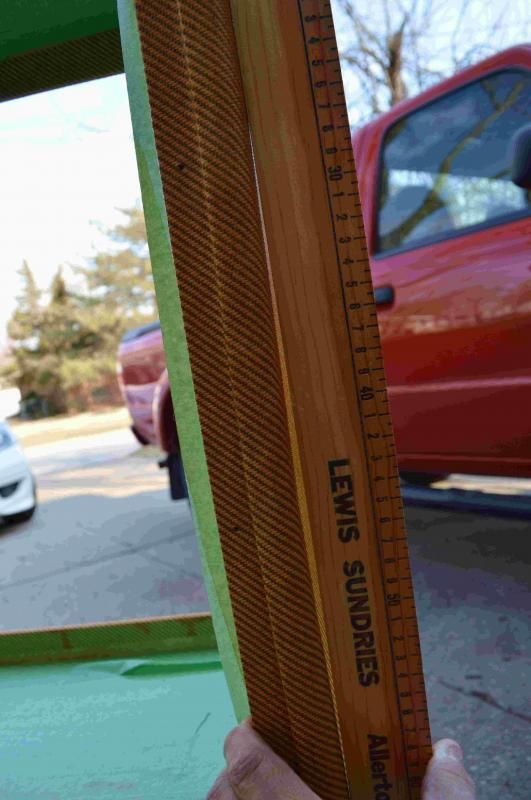
A few more weeks elapsed before the new cabinet arrived Friday last, but in the meantime I had had some time to think about the shellac finish and the prospects for getting a good application without discoloration-it is very easy for the end grain of the cloth to absorb the shellac which leads to permanent discoloration. It's liveable but I'm a perfectionist.
Some folks use Minwax Honey Pine polyurethane finish, but I don't like the look of the stuff at all-it's got a bit too much green in it and is far too slick for me, and I'm going for more of a tobacco coloration.
So I decided for my second try I was going to take my time and anoint the cabinet with clear shellac from the spray can, but that I was going to give it plenty of time to dry-like, a day or so, and pay special attention to the end grain of the fabric. Also, I decided I was going to build up the sealer coat substantially. So that's the plan and it's now baking in the sun after the second application.
I will probably give it another coat of clear and finish off the rattle can before I attempt to color it. I do have a can of clear shellac and I may try that as well. The object lesson is to take the time to build up a solid undercoat and properly seal the fiber. A light scuffing between coats after the shellac is properly dry is a must.
For those of you who haven't yet tried this, you need to assemble a spray can of Zinsser Bulls Eye clear shellac, a pint of their amber shellac, a quart of denatured alcohol, some green Scotchbrite scuff pads, a good brush, and some painter's tape. A fixture like I built can be thrown together in a few minutes. All this can be found at any hardware store, so take the opportunity to shop locally and use environmentally friendly products from renewable and sustainable resources-which shellac and alcohol are, but which polyurethane most surely is not.
As a point of information, shellac is a refined naturally produced resin that primarily comes from India. The resin itself is produced by insects and it is deposited on twigs and small branches of host trees. You can read all about the production process here.
Although shellac dries to the touch in about thirty minutes, it's still not cured and that's where being in too much of a hurry can take a good job and turn it into an unsightly one.
Saturday, April 13, 2013
Bassman Hack


What's interesting is the hack somebody laid on it. I guess the idea was to be able to run a tape player through it or something. I really do not think the guy knew what he was doing and it looked pretty nasty-not to mention he had the plate supply going through these pots whatever they were supposed to do. And a redplating power tube. And some extra high quality soldering of the grounds. But nevermind.
It all came out easily enough, it got serviced and recapped, new power tubes and plate load resistors, and things were reassembled According To Leo. Some plastic plugs from the local hardware store were the best I could do with the drilled out holes on the back panel.
Subscribe to:
Posts (Atom)